.svg)
Starting a business doesn’t require a fortune. Discover low-cost business ideas that need minimal investment but offer great potential for growth.

The web is intricate : many technologies and concepts are used to display a simple web page in your browser. I don't pretend to explain everything, but I'm going to explain the most important things you need to understand to extract data from the web.
The Hypertext Transfer Protocol (HTTP) uses a model client/server.

An HTTP client (a browser, your Python program, cURL, Requests... ):
HTTP is called a “stateless” protocol because each transaction (request/response) is independent.
When you type the address of a website into your browser, the HTTP request looks like this:

In the first line of this request, we can see the following items:
In short, here are the most important header fields and the ones we're going to focus on:
Here is an example of cookies used on LinkedIn.
And the list goes on... you can find the complete list of headers hither.
Regarding the response from a server, this is what it looks like:

On the first line, we have a new piece of information, the HTTP 200 OK code. This means that the request was successful. When it comes to request headers, there are a lot of HTTP codes. They are divided into four common classes:
Here is a non-exhaustive list of the most common codes:
Once the response to your HTTP request has been received by your web browser, it will analyze the HTML code, retrieve all potential assets (Javascript files, CSS, images...) and display the result in your page.
We're going to go over the different ways to make HTTP requests with Python and to extract web data.
The easiest way to make an HTTP request in Python is to open a Socket and to send the HTTP request manually.

Now that we have the HTTP response, let's extract data with what we call regular expressions (“regular expressions” in English commonly known as RegEx)
A regular expression (RE or regex) is a search pattern for strings.
With a regular expression, you can search for a particular character or word in a larger body of text.
For example, you can identify all the phone numbers or emails on a given web page.
You can also validate certain entries (for example to check that the email field only accepts... emails in your contact forms)
After all, there are lots of different Python modules for parsing HTML, with XPath or CSS selectors.

In a semantic world ideal, the data is easily readable by machines and the information is embedded in HTML elements with easily understandable and clear attributes.
But the real world is messy.
You will often find huge amounts of text inside a p element (paragraph). For example, if you want to extract specific data from a large text (a price, a date, a name...), you should use regular expressions.
Note: Here's a great website to test your regular expressions : https://regex101.com/.
Regular expressions can be useful when you have this type of data:
<p>Price: 19.99€</p>
We could select this text with an Xpath selector and then use this type of regex to extract the price:

Result: 19.99
You will then get the price directly. Regex will prevent you from needing to add steps needed to “clean up” the text.
To extract the right data from an HTML tag, it is feasible to use a regex:

Result: Price: 19.99€
As you can see, it's possible to manually send the HTTP request with a socket and analyze the response with a regular expression, but it's complicated and there are APIs that can make this task easier.
Urllib3 is a high level package that allows you to do just about anything you want with an HTTP request.
For example, with urllib3, it would have been possible to do everything we did previously with far fewer lines of code.

As you can see, this version is much faster than the socket version. Plus, the API is very easy to use.
Plus, you can easily do a lot of other things, like adding HTTP headers, using a proxy, writing into forms, sending them, etc...
For example, if we decided to set certain headers and use a proxy, all we needed to do was do this:

Do you see anything? There are exactly the same number of lines. However, there are some things that urllib3 doesn't handle very easily.
For example, if we wanted to create headers, we would have to add them manually (by simply simulating a header)
Then, to analyze the response, we're going to use the LXML package and the XPath expressions.
XPath is a technology that uses expressions to select nodes or sets of nodes in an XML document (or an HTML document).
Like the DOM (Document Object Model), Xpath has been a W3C standard since 1999.
While XPath is not a programming language in itself, it allows you to write expressions that can directly access a specific node, or a specific set of nodes, without having to go through the entire HTML tree (or XML tree).

For extract web data For an HTML document with XPath, we need three elements:
To start with, we're going to use the HTML code that we got from urllib3.
Let's say we want to extract all of the links from the Google home page.
So we're going to use a simple XPath: //a expression. And we'll use LXML to run it.
LXML is a fast and easy to use XML and HTML processing library that supports XPATH.
Installation :

Here is the code that comes just after what we wrote previously:

Here is what the output of this code looks like:

Keep in mind that this example is really very simple and doesn't show you how powerful XPath can be.
The LXML documentation is well-written and a very good starting point if you want to improve your skills.
XPath expressions, like regexes, are powerful and are one of the fastest ways to extract information from HTML.
And like regexes, XPath can quickly get messy, hard to read, and hard to maintain. As such, it is important to document your code so that you can easily return to it later.
Requests is the king of Python packages.
With over 11,000,000 downloads, it is the most widely used Python package.
Setup:

Making a request with Requests is easy:

With Requests, it's easy to make POST requests, manage cookies, request settings, etc...
Authentication
Let's say we want to create a tool to automatically submit messages in forms. (For example, contacting hundreds of freelancers automatically on a famous French site...).
We would need to authenticate ourselves on these sites before carrying out these actions and to set up random timers to avoid the detection of robots.
It's possible to do that with Requests and BeautifulSoup.
Here's the form that might look like:
(I purposely only included snippets of code because the original is nearly 350 lines long)

We're going to see right away what BeautifulSoup is.
The next thing we need is BeautifulSoup, which is a Python library that will help us analyze the HTML code returned by the server, to find out if we are connected or not.
Setup:

So, all we need to do is POST these three entries with our credentials to the /login endpoint and check for an item that only shows up when logged in:

In order to learn more about BeautifulSoup, we could try to extract for example all the names of the tools present on the page of www.seo.sales-hacking.com.
The first thing we have to do is inspect the home page to understand the structure and the different CSS classes that we will have to select:

We can see that all the menu names are contained within one<div class="caption">. So the first thing you need to do is select all of these tags.
I will show you that it is possible to recover in a few lines of code:

I'll let you try the code if you want to see that you quickly retrieve all the requested information.
Requests and BeautifulSoup are great libraries for extracting data and automating various actions by posting forms.
If you want to do large-scale web scraping projects, you can still use Requests, but you'll need to manage a lot of the stuff yourself.
When you need to collect data from a large number of web pages, there are a lot of things you need to manage:
Luckily for us, there are tools that can take care of that for us.
While the request package is easy to use, you might find it a bit slow when considering collecting data across hundreds of pages.
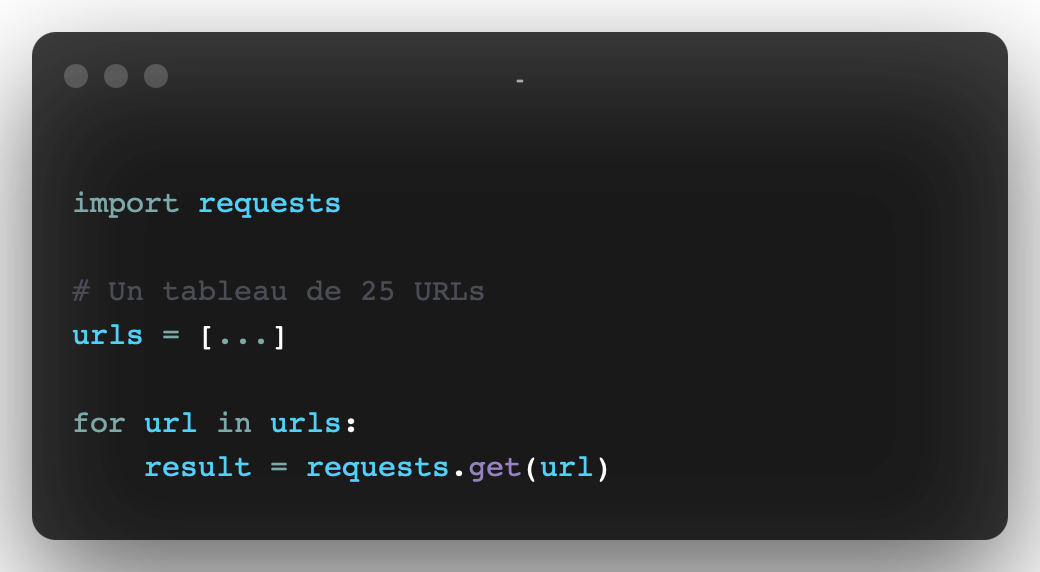
The requests package, as it is, only allows so-called “synchronous” requests. That means if you have 50 URLs to scrape, you should do them one by one.
So, if you take 10 seconds to collect the data for one page, it will take 50 x 10 seconds to retrieve 50 pages.
The easiest way to speed up this process is to make multiple calls at the same time. This means that instead of sending each individual request one after the other, you can send them in batches.
Let's take an example:
By sending your previous 50 requests in batches of 5, you then get 10 batches x 5 requests. This has a big impact on data collection time because you're simply dividing it by 5.
So, the scraping process will take place by:
In many programming languages, this type of processing is implemented using the thread-based parallelism. This concept can be tricky for beginners, luckily, there is a package that does all the work for you: grequest.
This library allows us to send several requests at the same time, in a simple and effective way.
Here's how the code to do our previous example, i.e. send our 50 URLs in batches of 5:

Grequest is perfect for scripting but not suitable for production code or large-scale web scraping. For this, another solution is available to you: Scrapy 👇.

Scrapy is a powerful Python framework from Web scraping and web crawling..
Scrapy offers numerous features for asynchronously downloading, processing, and saving web pages. It handles multithreading, crawling (the process of going from link to link to find every URL on a website), sitemap crawling, and much more.
Scrapy has a version with an interface (IDE) but also a more classical mode called Scrapy Shell.
With the Scrapy Shell, you can quickly test your scraping code, like XPath expressions or CSS selectors.
The downside of Scrapy is that the learning curve isn't always easy. There is a lot to learn to improve your skills.
We're going to write a Spider Scrapy that extracts the first 15 pages of a news blog and saves the result in a JSON file.
You can easily install Scrapy with pip:

You can then use Scrapy's CLI to generate the base code for our project:

In our folder (spider) we are going to create a new Python file with the following code:

There are a lot of conventions in the code for Scrapy.
We define an array of URLs (the set of pages that we are going to browse).
The Parse method will be called on each URL in the array (start_urls.)
We then need to adjust Scrapy a bit to make our Spider behave properly with the target website.

You should always activate it. It ensures that the target website is not slowed down by your spiders. To do this, it analyzes the response time and adapts the number of simultaneous threads.
If your target site is not going to let you access it through your bot, feel free to add Headers to simulate a web browser like this:

To execute this code here is how to do it (configurable with different output formats):

And that's it! You will now have all of your information in a fully formatted JSON file.
There is much more to say about this tool but it could be the subject of a totally dedicated article.
Scrapy is ideal for web scraping tasks on a large scale. However, it is not enough if you need to scrape a page generated by Javascript frameworks.
Scraping this type of application can be difficult because there are often a lot of AJAX calls and websockets connections.
If performance is an issue, always try to reproduce the Javascript code. That means manually inspecting all network calls with your browser's inspector and reproducing AJAX calls that contain interesting data.
In some cases, there are too many asynchronous HTTP calls to get the data you want and it may be easier to render the page in a headless browser.
Another good use case would be to take a screenshot of a page, and that's what we're going to do now.
You can install the selenium package with pip:

You will also need the Chromedriver :

Then, simply import the Webdriver from the Selenium package, configure Chromedriver with headless=True, and set a window size (otherwise you won't see much):

You should get a nice screenshot of the home page:

Here's what's possible you can do a lot more with the Selenium API and Chrome:
Selenium and Chrome are the ultimate combination for collecting data on the web. You can automate everything you can do with your regular Chrome browser.
The big downside is that Chrome needs a lot of memory and CPU power. With fine tuning, you can reduce the memory footprint to 300—400 MB per Chrome instance, but you still need one CPU core per instance.
If you want to run several instances of Chrome simultaneously, you may quickly need powerful servers as well as monitoring of the resources used.
RoboBrowser and Mechanize are Python libraries that allow you to browse the web using requests and BeautifulSoup through code that is quick to set up.
It's not about navigators Strictly speaking, but rather instances simulating browsers where it is possible to collect data and perform actions using Python scripts.
If you need to interact with web services that don't have APIs, RoboBrowser or Mechanize can help.
For example, if you want to connect to a website, you can write a script that will fill in the fields of a form and “press” the login button:

As you can see, the code is written as if you were manually performing the actions in a real browser.
RoboBrowser and Mechanize are really cool because their simple approach allows you to set them up quickly.
However, since they do not use a real browser (a Chrome or Mozilla driver for example), they are not able to manage the execution of JavaScript like AJAX calls or certain applications.
Here's a quick summary of all of the technologies we've talked about in this article. Feel free to comment if you know of resources that you think belong here.

Hope you enjoyed this article!
This is a quick introduction to the most used bookstores for web scraping in python.
If you don't have the time or the skills to set up a Python project, you can use web scraping tools.
READ MORE: The best tools for collecting data on the web
When working on NLP problems, sometimes you need to obtain a large corpus of text. The Internet is the biggest source of text, but unfortunately, extracting text from arbitrary HTML pages is a difficult and painful task.
Let's say we need to extract the full text from various web pages and we want to remove all HTML tags. In general, the default solution is to use the get_text method of the BeautifulSoup module that uses lxml internally. It's a tried and tested solution, but it can be very slow when working with hundreds of thousands of HTML documents.
By replacing BeautifulSoup with Selectolax, you can get a speed boost of 5 to 30 times almost for free!
Here is a simple benchmark that analyzes 10,000 HTML pages from Common Crawl:
Clearly this is not the best way to test something, but it does give an idea that selectolax can sometimes be 30 times faster than lxml.
The engine itself is a very powerful and fast HTML5 parser written in C by Lexborisov.
Selectolax is not limited to a single use case and supports CSS selectors as well as other HTML traversal functions.