.svg)
Learn how to use Wix to create a customized website. Follow this guide to unlock the potential of Wix and personalize your site to suit your needs.

Before you can test your creativity with the Wix editor, you need to sign up for the service.
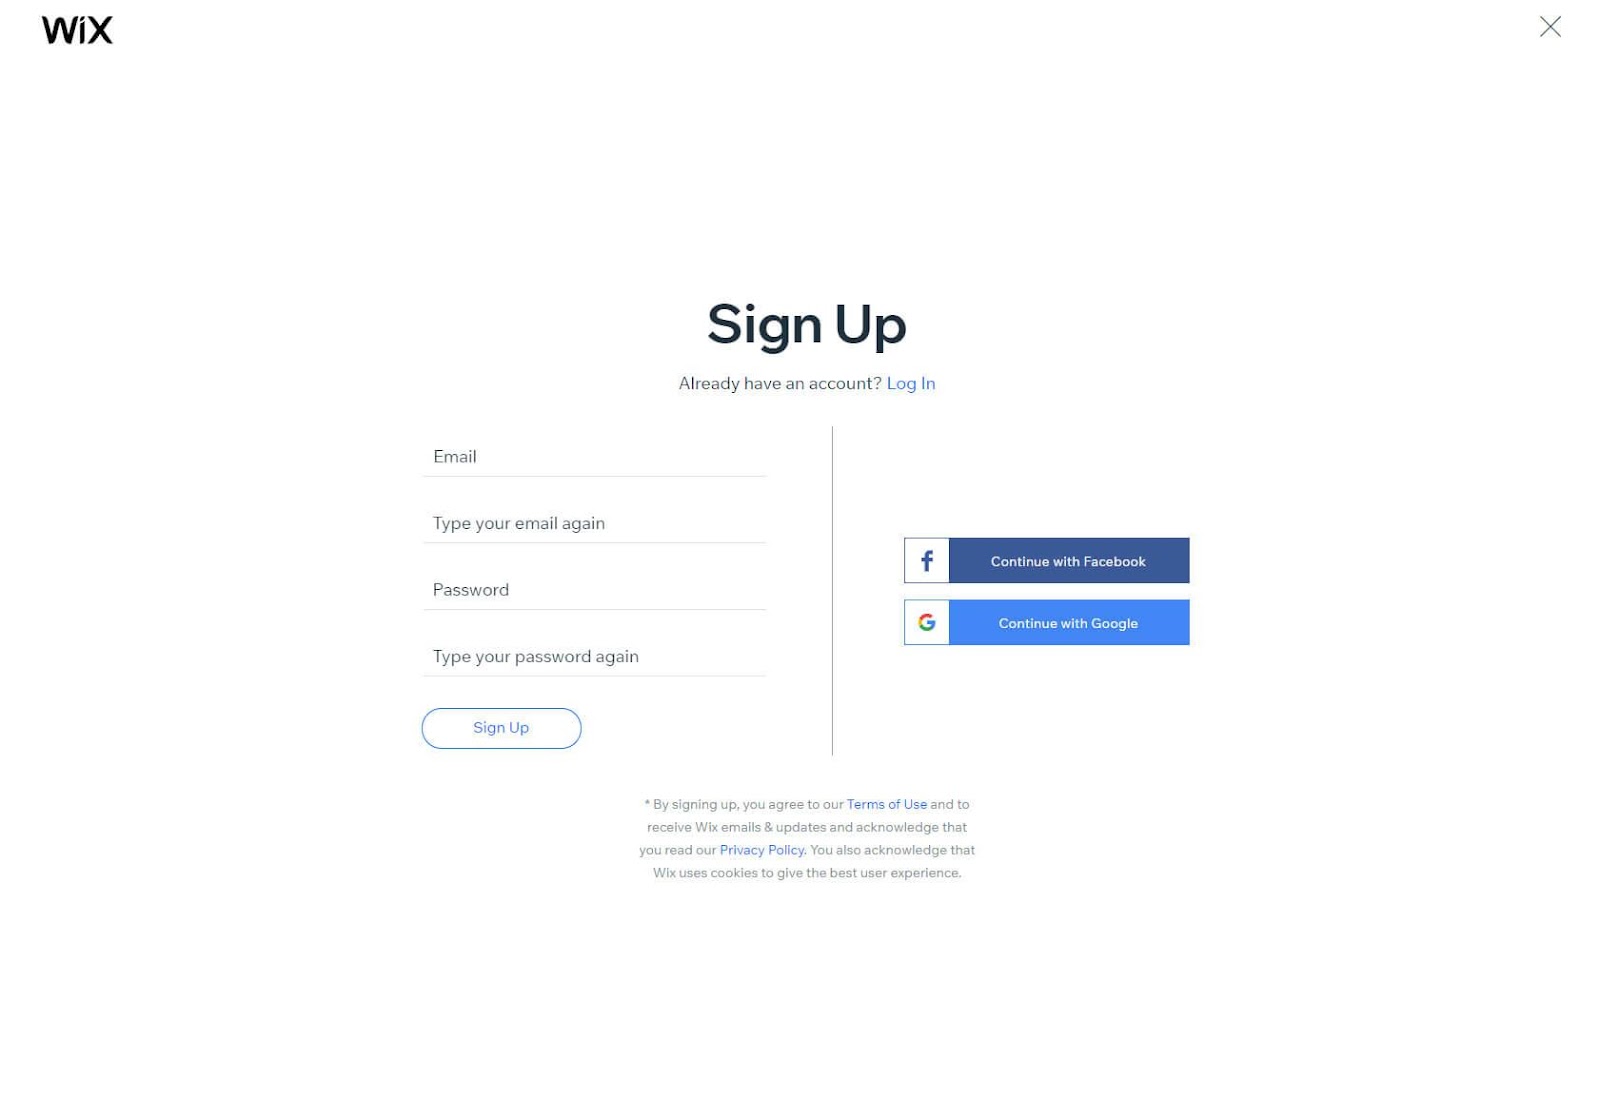
It only takes one or two minutes to enter your email and password. Clicking the “Register” button takes you to the next step, which involves answering a few questions about what you are trying to build.

Choosing a template is like window shopping.
Depending on your answers (if you did not skip the questionnaire), several templates dedicated to the niche in which you have shown interest will be presented to you.
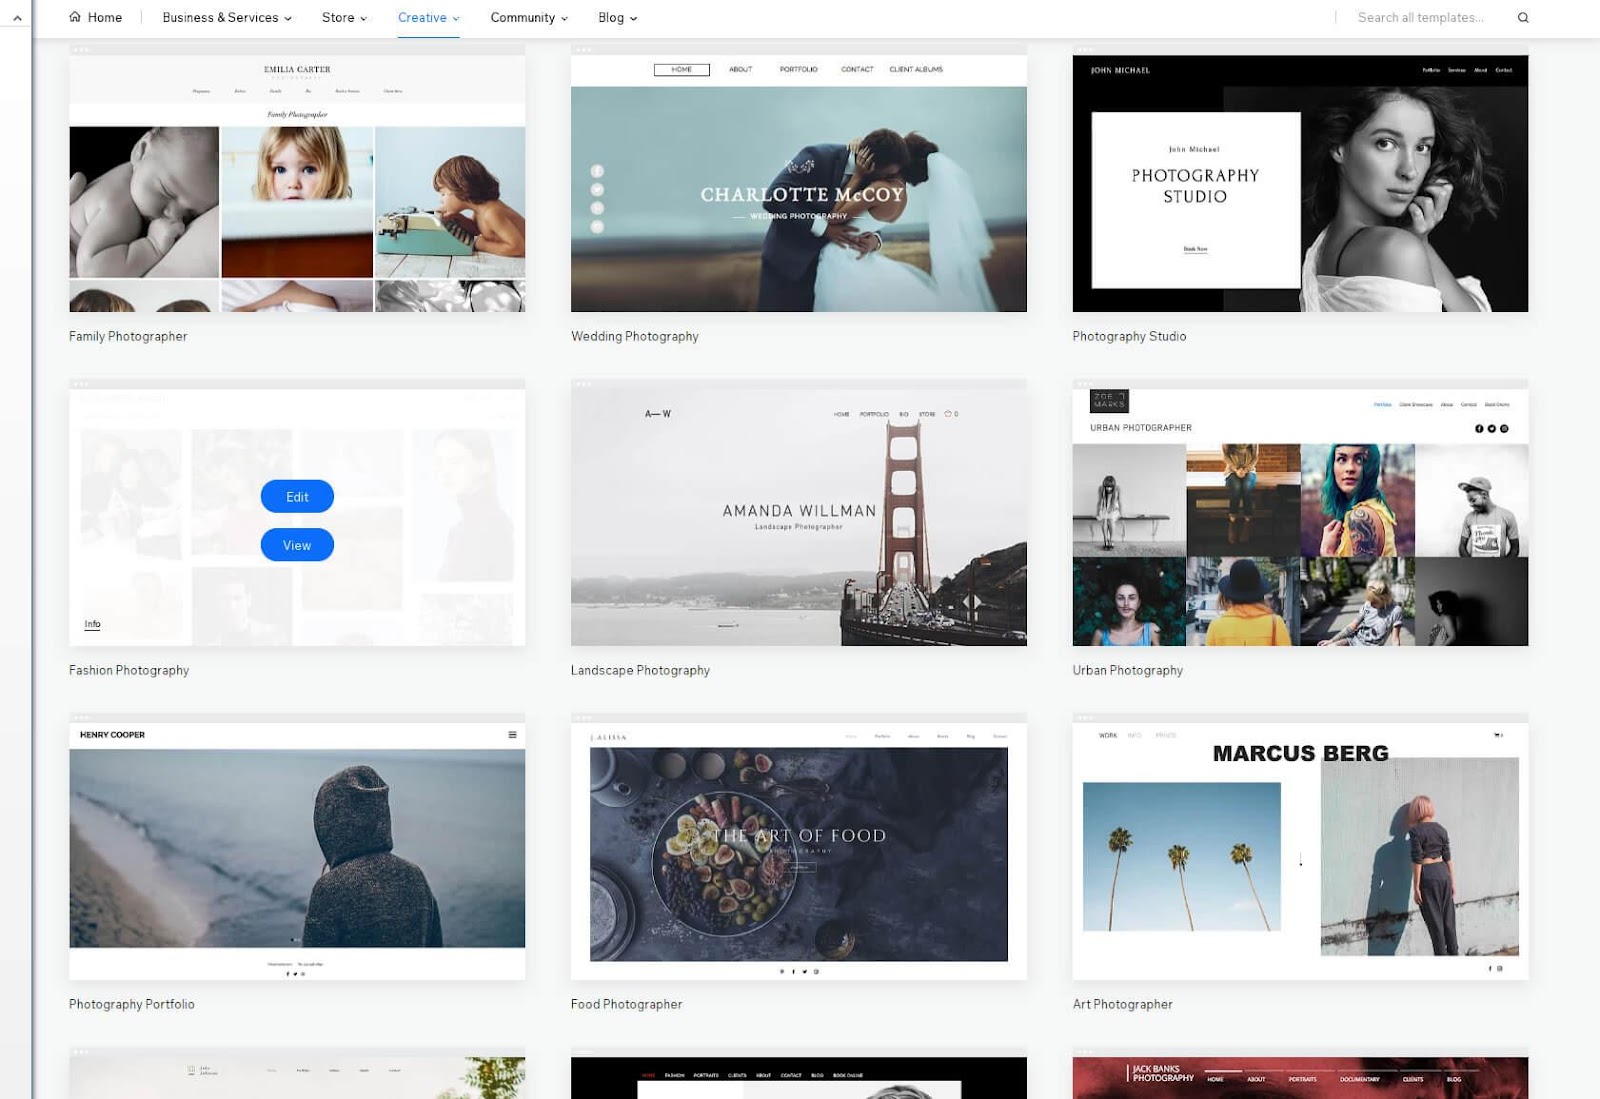
Feel free to browse and visualize all the themes that caught your attention. If you're not sure about the details, take a look at the bottom left corner of the thumbnail where you'll see a very small “info” link. Once you are ready, click on the edit button.
If you are not very demanding on the theme, it will only take 2 or 3 minutes to set everything up. And you don't need to be difficult, because you can always start over. Now that you've clicked the “Edit” button, Wix will load its famous editor that will allow you to start creating your site. If you're not adventurous enough to start testing the editor right away, you can watch the tutorial video to get you started.
From a technical point of view, your site has already been created. However, there is no personal information yet, just the contents of the demo.
In order to personalize your website, you'll then start making changes with the Wix editor.
RECOMMENDED READING: How to create a Wix website (step-by-step guide)
Everything about Wix is user-friendly and easy to understand. To make changes to the content, simply click on an item that you want to change. After clicking, a small menu appears above the selected item, showing you the most important settings.
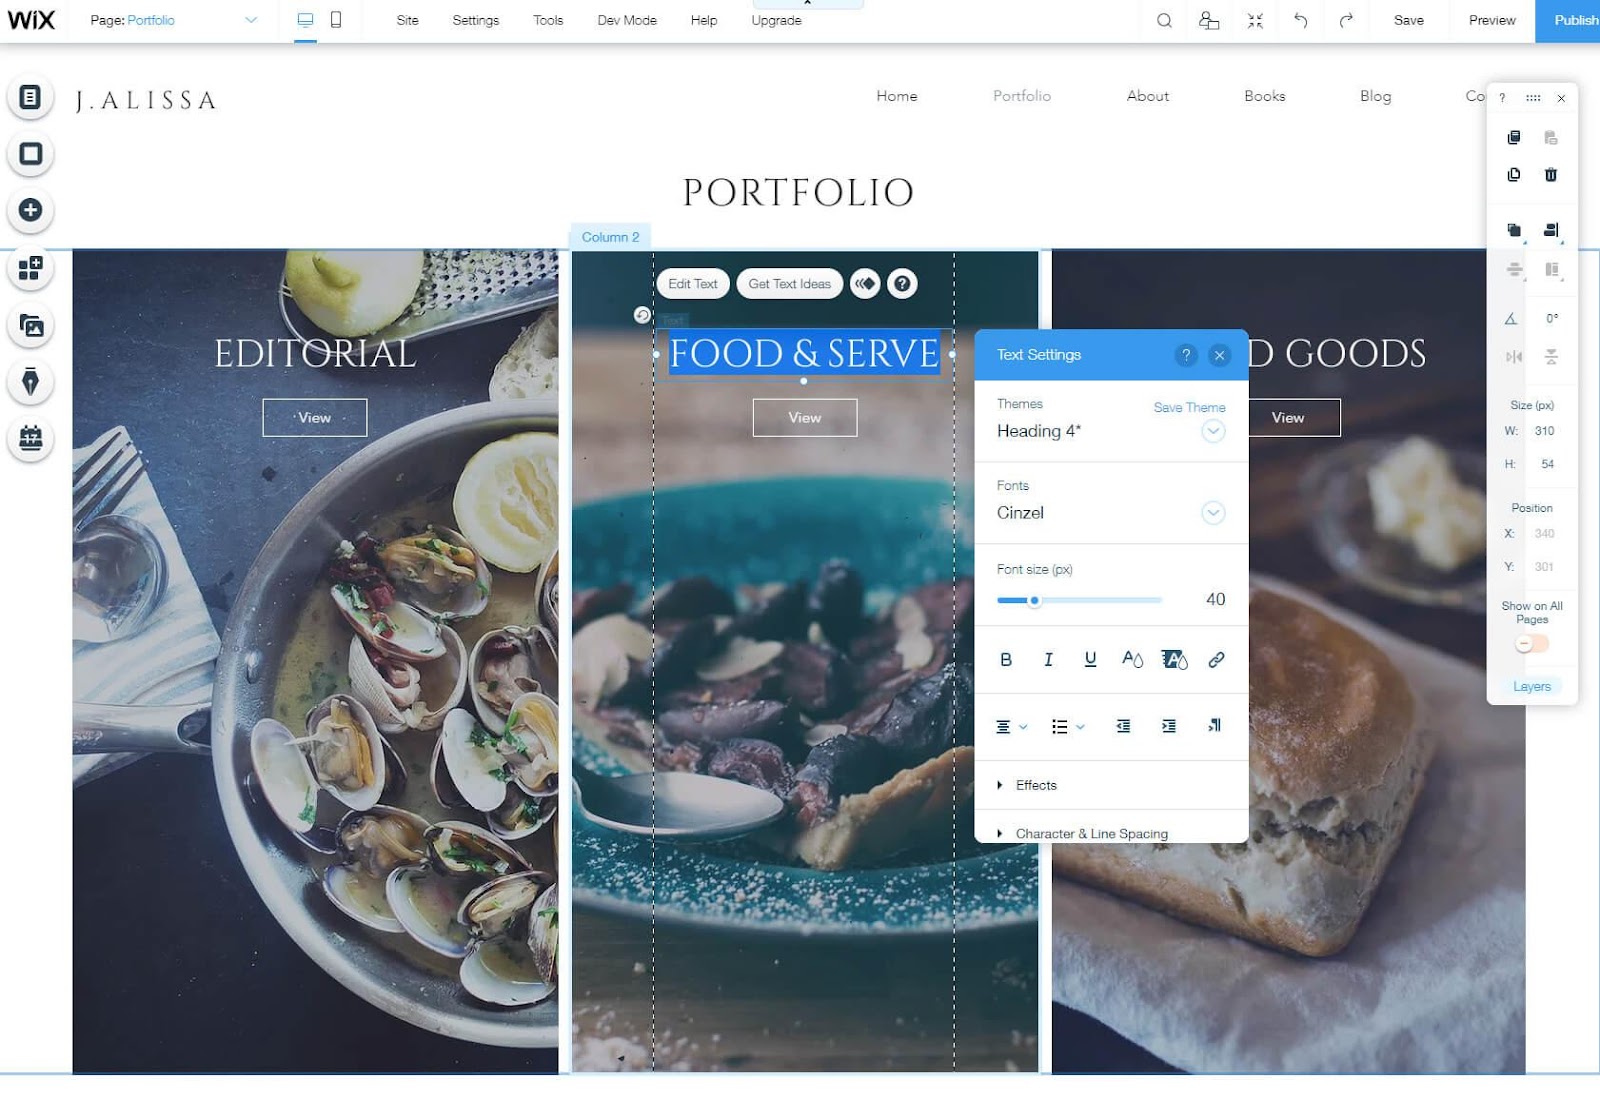
For example, by selecting a background, you can change images, effects, and positions. Text elements will allow you to change font types, sizes, header types, and more.
Essential functions will be available from the left side menu, which is always visible in the editor. This menu will allow you to access options related to menus, pages, backgrounds, items, applications, media, blogs, etc.
There's another crucial part of the editor that you need to know about, and that's the small toolbar on the right side of the screen. This is where you'll find the commands to copy, paste, duplicate, delete, arrange, and perform several other actions on a selected item. This may not seem very important at first, but it will save you time when you start to move through the editor more quickly.
Selecting a beautiful template is a great way to get started. However, no matter how appealing a template is, you'll likely need to add additional features. This will help you create a site that's all your own and allow you to create something that you've probably already imagined in your head or maybe even put on paper.
Whether you need a new text block, an image, a video, a form, or anything else, you can add it through the main menu.

This element is now part of your website and you can move it around the page until you find the ideal location. To make additional changes to the newly added item, click on it and select one of the options displayed just above it.
You can repeat this process with as many items as you want. Don't be afraid to be playful! Try the features, and if you don't like them, simply remove them from the page by clicking on the trash can icon in the toolbar. You see, the toolbar is already becoming useful!
Creating a beautiful home page is usually the first step. However, sooner than you think, you will realize that you need a few more pages. No problem! With Wix, it's just a piece of cake:

Before you know it, you've created a new page. You can create as many pages as you want, and design them later using the editor.
The great thing about Wix is that these pages are automatically organized in your main menu. If you decide to reorder menu items, show or hide pages, or rename pages, you can do it all from the same settings page.
Nowadays, many people create their website exclusively for create a Wix blog. Others who don't generally need a blog may also discover that they want one as a complement to their personal or business website. The people at Wix know this, so they've made it easy for you to add a blog with just a few mouse clicks. In most Wix themes, a blog will automatically be added, so all you need to do is access it.
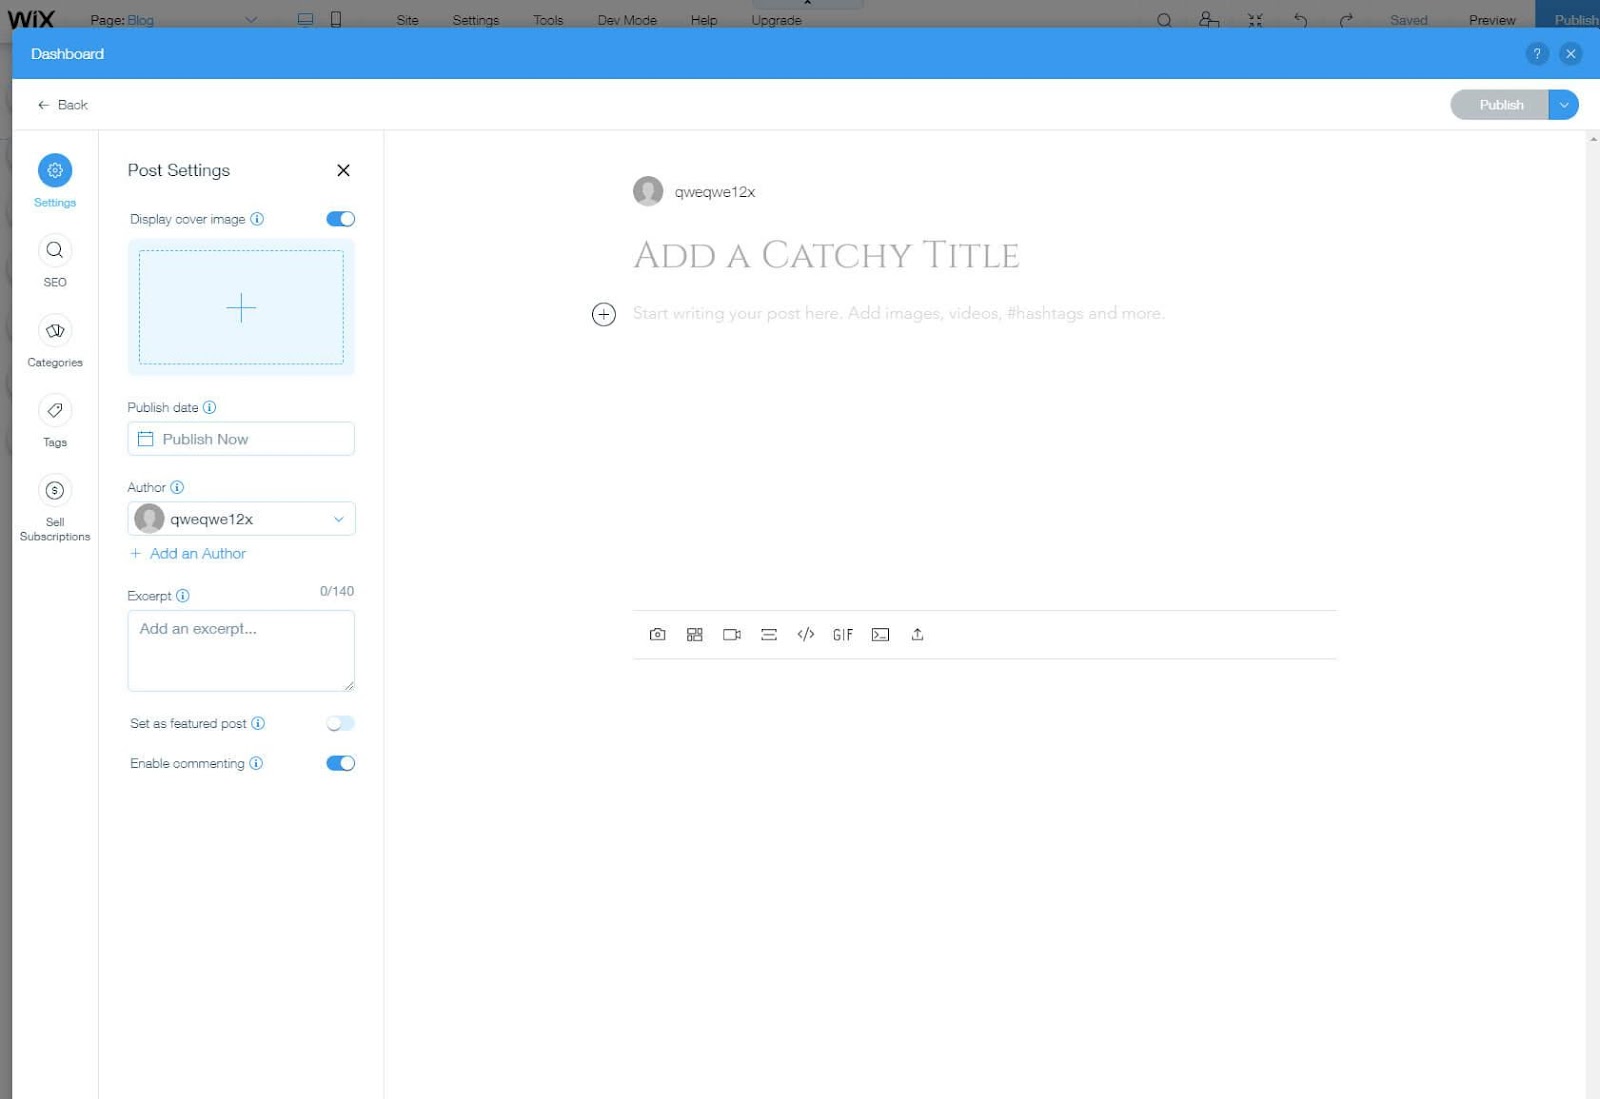
This opens a new window that contains an entire dashboard dedicated to blogging. You can add anything you need to publish your first post on Wix:
That is all. As you can see, creating an article is easy from a technical point of view. Now it's time to roll up your sleeves and start creating unique content for the blog and feeding it with dozens of interesting articles. Feeling the pressure already?
While Wix “has it all,” there are always more features that your website can have. If you feel the same way and you're missing something in the editor, don't worry! Wix apps are here to save you.
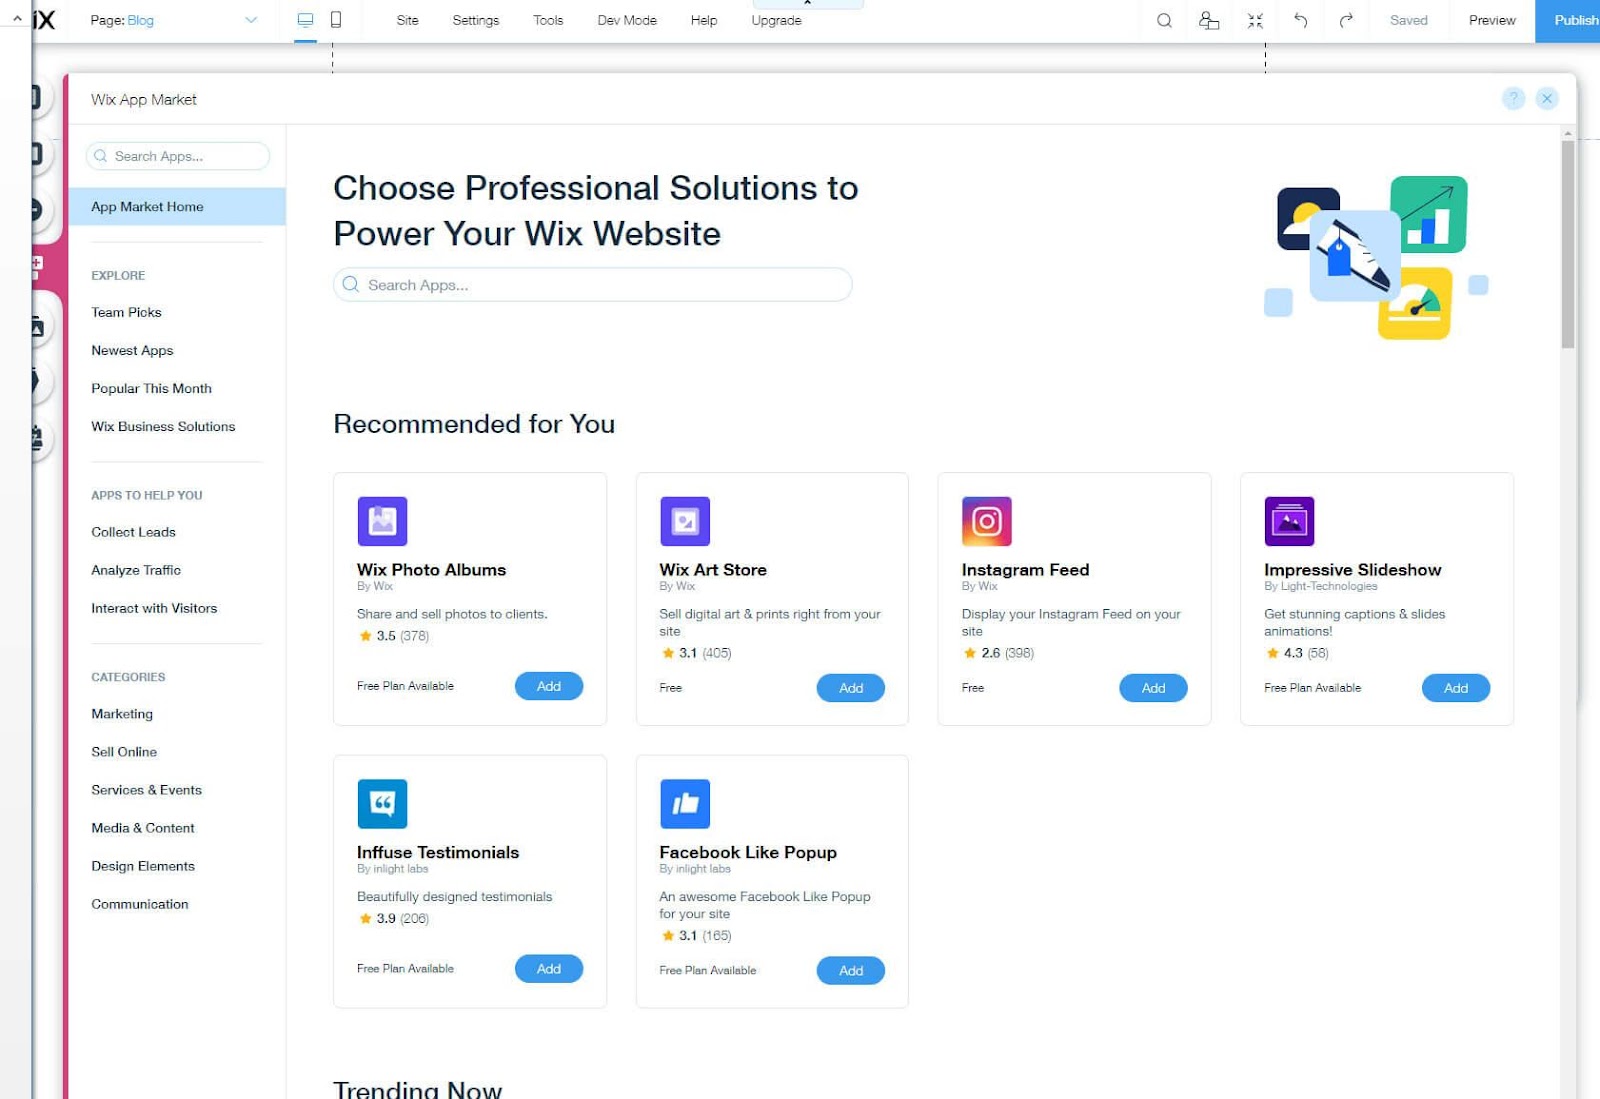
Clicking on the Apps item in the main menu will open a portal to a whole new dimension. OK, maybe I'm overdoing it. It is only the Wix App Market. But it contains over 250 applications that can extend the capabilities of your site and help you improve it.
Whether you want to add new elements, media, and content, or e-commerce features, the Marketplace probably has everything you need. Feel free to browse and look for specific features. Once you've found the application you need, click on the blue “Add” button. Wix will automatically install the new module and display it in the editor. To edit a new item, click on it to access the settings where all the magic happens.
It's 2022, and mobile devices have already become something we can't live without. So regardless of how your site looks and performs on desktop machines, it may be even more important to make sure your site looks good on smartphones and tablets. It's also crucial for SEO.
Luckily, Wix has a fantastic mobile editor that will help you make changes to your website.

Your mobile publishing journey starts by selecting the smartphone icon from the menu. After that, Wix will show you some details and guide you through the configuration to choose the behavior of your mobile pages.

You need to select the appearance of the menu and a few other options before accessing the real mobile editor. Just like editing a desktop version of the site, you have a menu on the left side of the screen where you can control the creator. You can customize the menu, pages, and background (very similar to the desktop editor), but the focus is on mobile tools. These allow you to add quick action bars, customize the “back to top” button, edit a welcome screen, and even match Chrome's address bar to your site.
Another amazing feature of the mobile editor is that of the hidden elements. While previewing your mobile site, move the cursor over an element. If this element is not suitable for the mobile site, click on the small eye icon to hide it. There you go! The selected item will only be visible on desktop devices and laptops, and will remain hidden for anyone accessing your site from a smartphone or tablet!
If you're not as creative, pick the last item on the menu and let Wix artificial intelligence optimize the mobile site for you.
SEO or search engine optimization is a process that allows you to make your site more recognizable and easier to find on the Internet. With Wix, you can access your settings through the dashboard to open SEO options from the main menu.
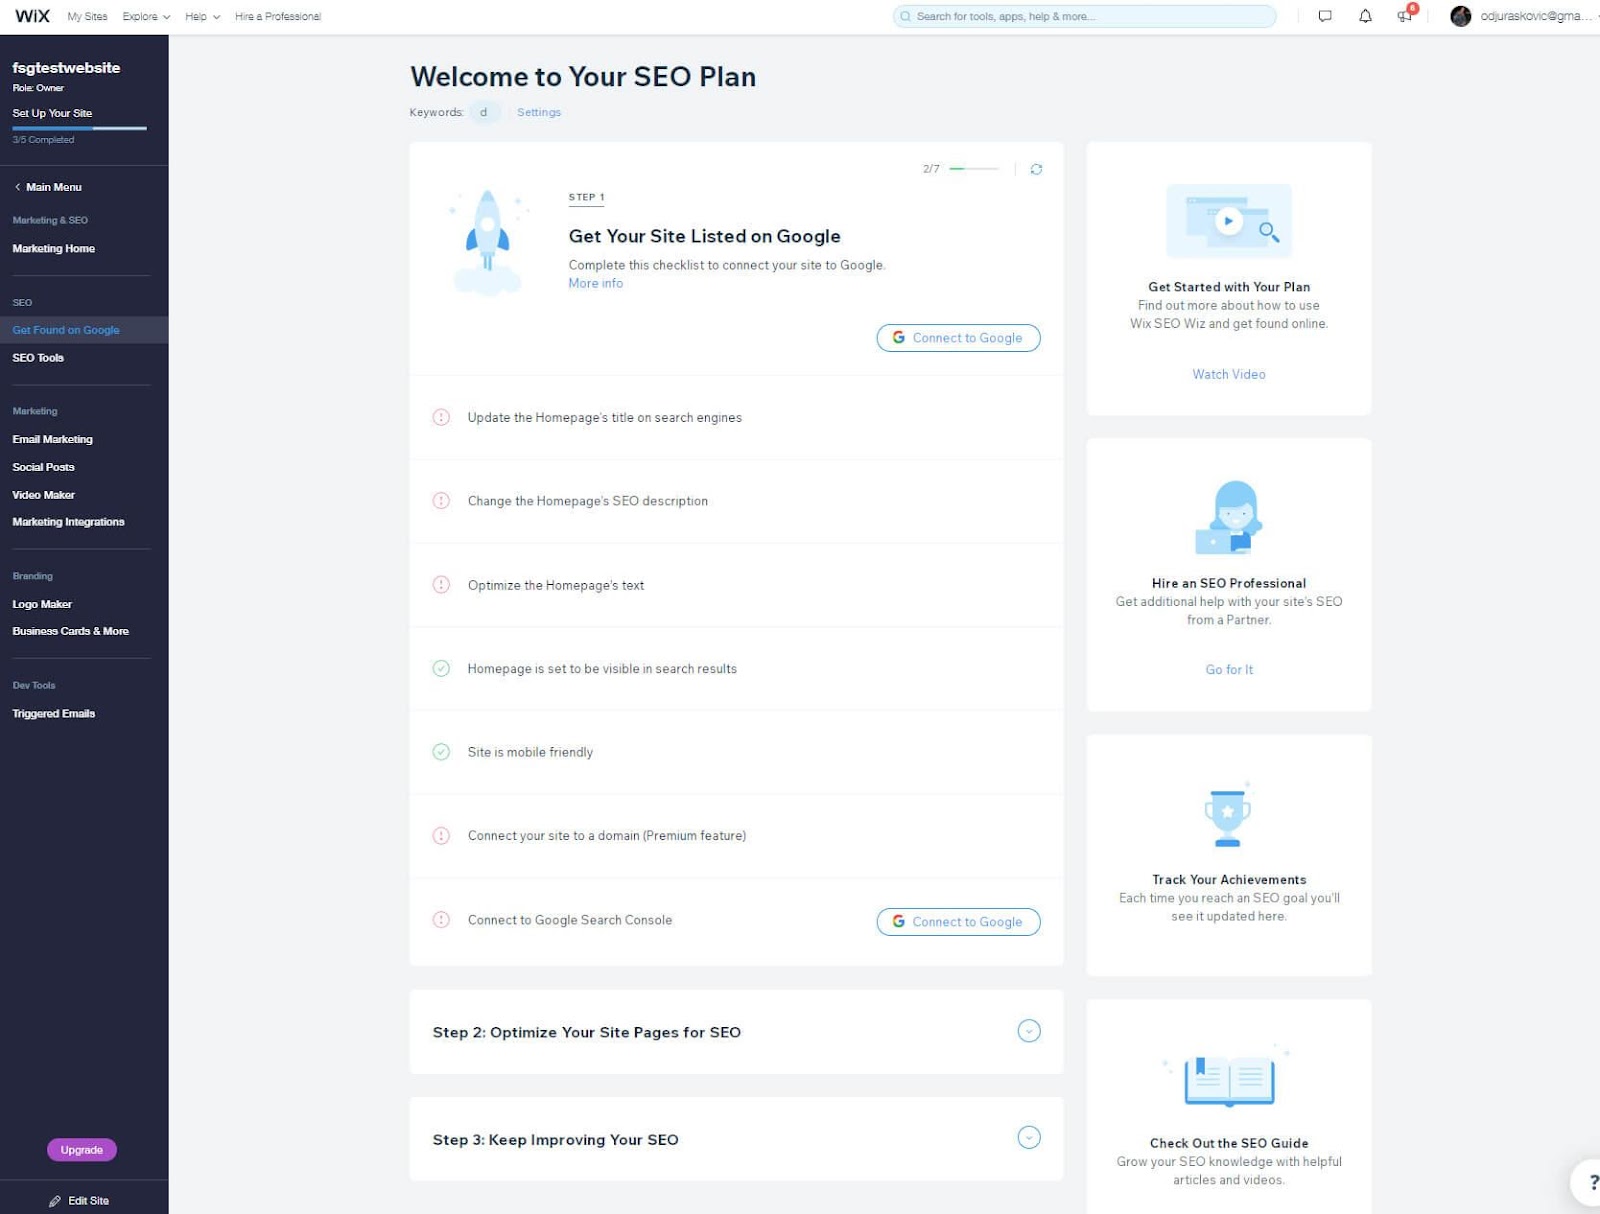
After selecting “Get Found on Google,” Wix will guide you through a series of questions about your business. Then, Wix will focus on crucial elements such as updating the title, description, and text on your home page, and many other elements that will better optimize your site.
Even if you don't have a lot of SEO knowledge, take your time and go one area at a time. Do your best to describe what your site is. SEO options are a great way to get started, but don't expect them to bring you millions of visits overnight. You'll need to do and learn a lot more before you can have a more significant impact on SEO. Do not hesitate to consult the best SEO software free and paid.
RECOMMENDED READING: SEO Wix- Guide to optimizing your website
When you start your first Wix site, you're using their free plan. A free plan includes a free subdomain that is also the address of your site.
A free subdomain is great because it allows you to publish your site without spending a cent on something you're not sure you want to keep yet. However, as soon as you realize that you want to go ahead and take your website more seriously, you'll want to connect a custom domain and have a unique address that people will use to access the content you've created.
Luckily, Wix makes it easy to connect a new domain.

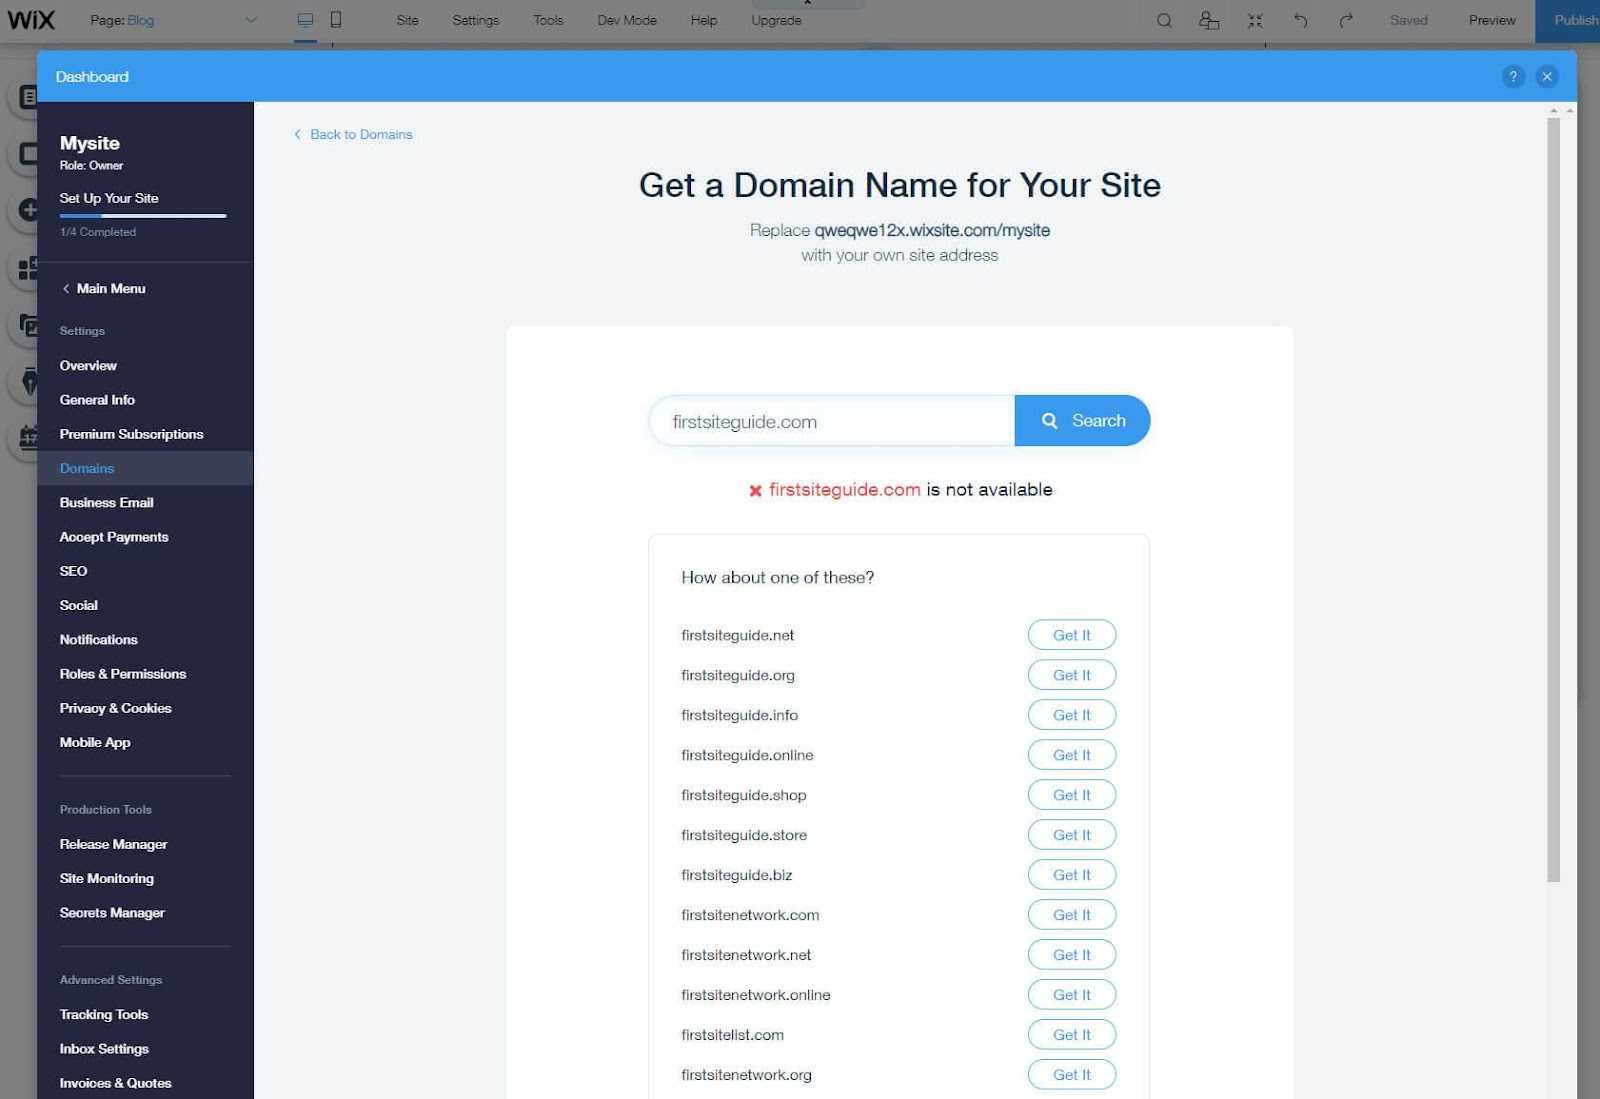
Wix will instantly let you know if the domain name is available and suggest similar names if your search did not return available results.
Click “Get It” once you've found a domain name you like, and follow the steps to complete the registration process.
If you already have a domain, you can transfer it to Wix by choosing the second option.
However, to sign in or buy a domain, you'll need to upgrade your plan. When it comes to domain names, you can work with a custom domain, even on their most basic plan that starts at $4.50/month.
How do I upgrade?

A dashboard is a place where administrators like (or should) spend most of their time. This page brings everything together and allows you to set up the right settings page or start editing your site.
When you first open the dashboard, the focus is on your first website. You will be able to see the name of your site, its URL, some features that you have activated, and the plan that you are currently using.

The most important button is at the top of the page, where you can access all site actions. Click to edit the site, preview it, rename it, duplicate it, transfer it, invite contributors, or even put it in the trash if necessary. If you want to start a new site, you will have the option available in this menu.
If you scroll down the page, you'll find more options for setting up your site. Wix will show you a progress bar and guide you. If you still haven't connected a domain, this is also where Wix will remind you how to do it.
If you look to the left, you'll find another menu that contains essential site settings. From this menu, you can access your blog, use business tools, manage customers, update marketing and SEO, check analytics and reports, and review your finances. The main settings, applications, and content manager can also be found here.
When you decide to make changes to your Wix account, you can do so by placing the cursor at the top right corner of the page. Click on your image and email address to access additional settings.
Wix has worked really hard to create a simple and free website builder that beginners can use. While viewing all of these menus, settings, and toolbars may seem daunting at first, you'll quickly feel more comfortable.
The best way to learn how to use Wix is to practice. It's free, so give it a try, start exploring the dashboard, the editor, and create your first site. Very quickly, you'll find that you know how to find most options and that you're enjoying creating your site with Wix.
RECOMMENDED READING: